Visit Japan Web Registration: The Step-by-Step Guide to Skipping the Arrival Line (2026)
This post may contain affiliate links. If you book or buy through them, we may earn a commission at no extra cost to you.
Do You Actually Need to Register for Visit Japan Web?
Visit Japan Web (VJW) is the free, official pre-arrival service run by Japan’s Digital Agency at vjw.digital.go.jp. It bundles three separate arrival procedures into one account: the immigration entry record that used to be a paper disembarkation card, the customs declaration that used to be the yellow paper form, and an optional tax-free shopping registration.[1]
Registration is not mandatory. Japan Customs explicitly recommends filing electronically through Visit Japan Web but confirms the paper customs declaration form “can still be used, and can also be printed out (on A4 sized paper) in advance.”[2] Cabin crew still hand out paper arrival and customs cards on the flight, and immigration counters still accept them. Skipping VJW does not get you turned away — it just means filling out two paper forms by hand and queueing at a manual counter instead of the shorter electronic-gate line. For a first-time visitor with an IC passport, ten minutes of registration before the flight is worth it, especially if you’re also connecting onward by Shinkansen or a tight itinerary and want to save time at immigration.
What You Need Before You Start
- A valid passport (the same one you’ll travel on), read chip data is entered manually or scanned by phone camera.
- An email address you can access on your phone while traveling — this is your login and where verification codes go.
- Flight number and arrival date.
- The address of where you’re staying your first night in Japan, including postal code — hotel confirmation emails usually have this.
- A rough idea of what you’re bringing into the country, for the customs declaration questions.
It’s also a good moment to confirm you’re covered if something goes wrong on the trip — see whether travel insurance is worth it for Japan before you fly, since that’s a separate step VJW doesn’t cover.
Step-by-Step: From Account to QR Code
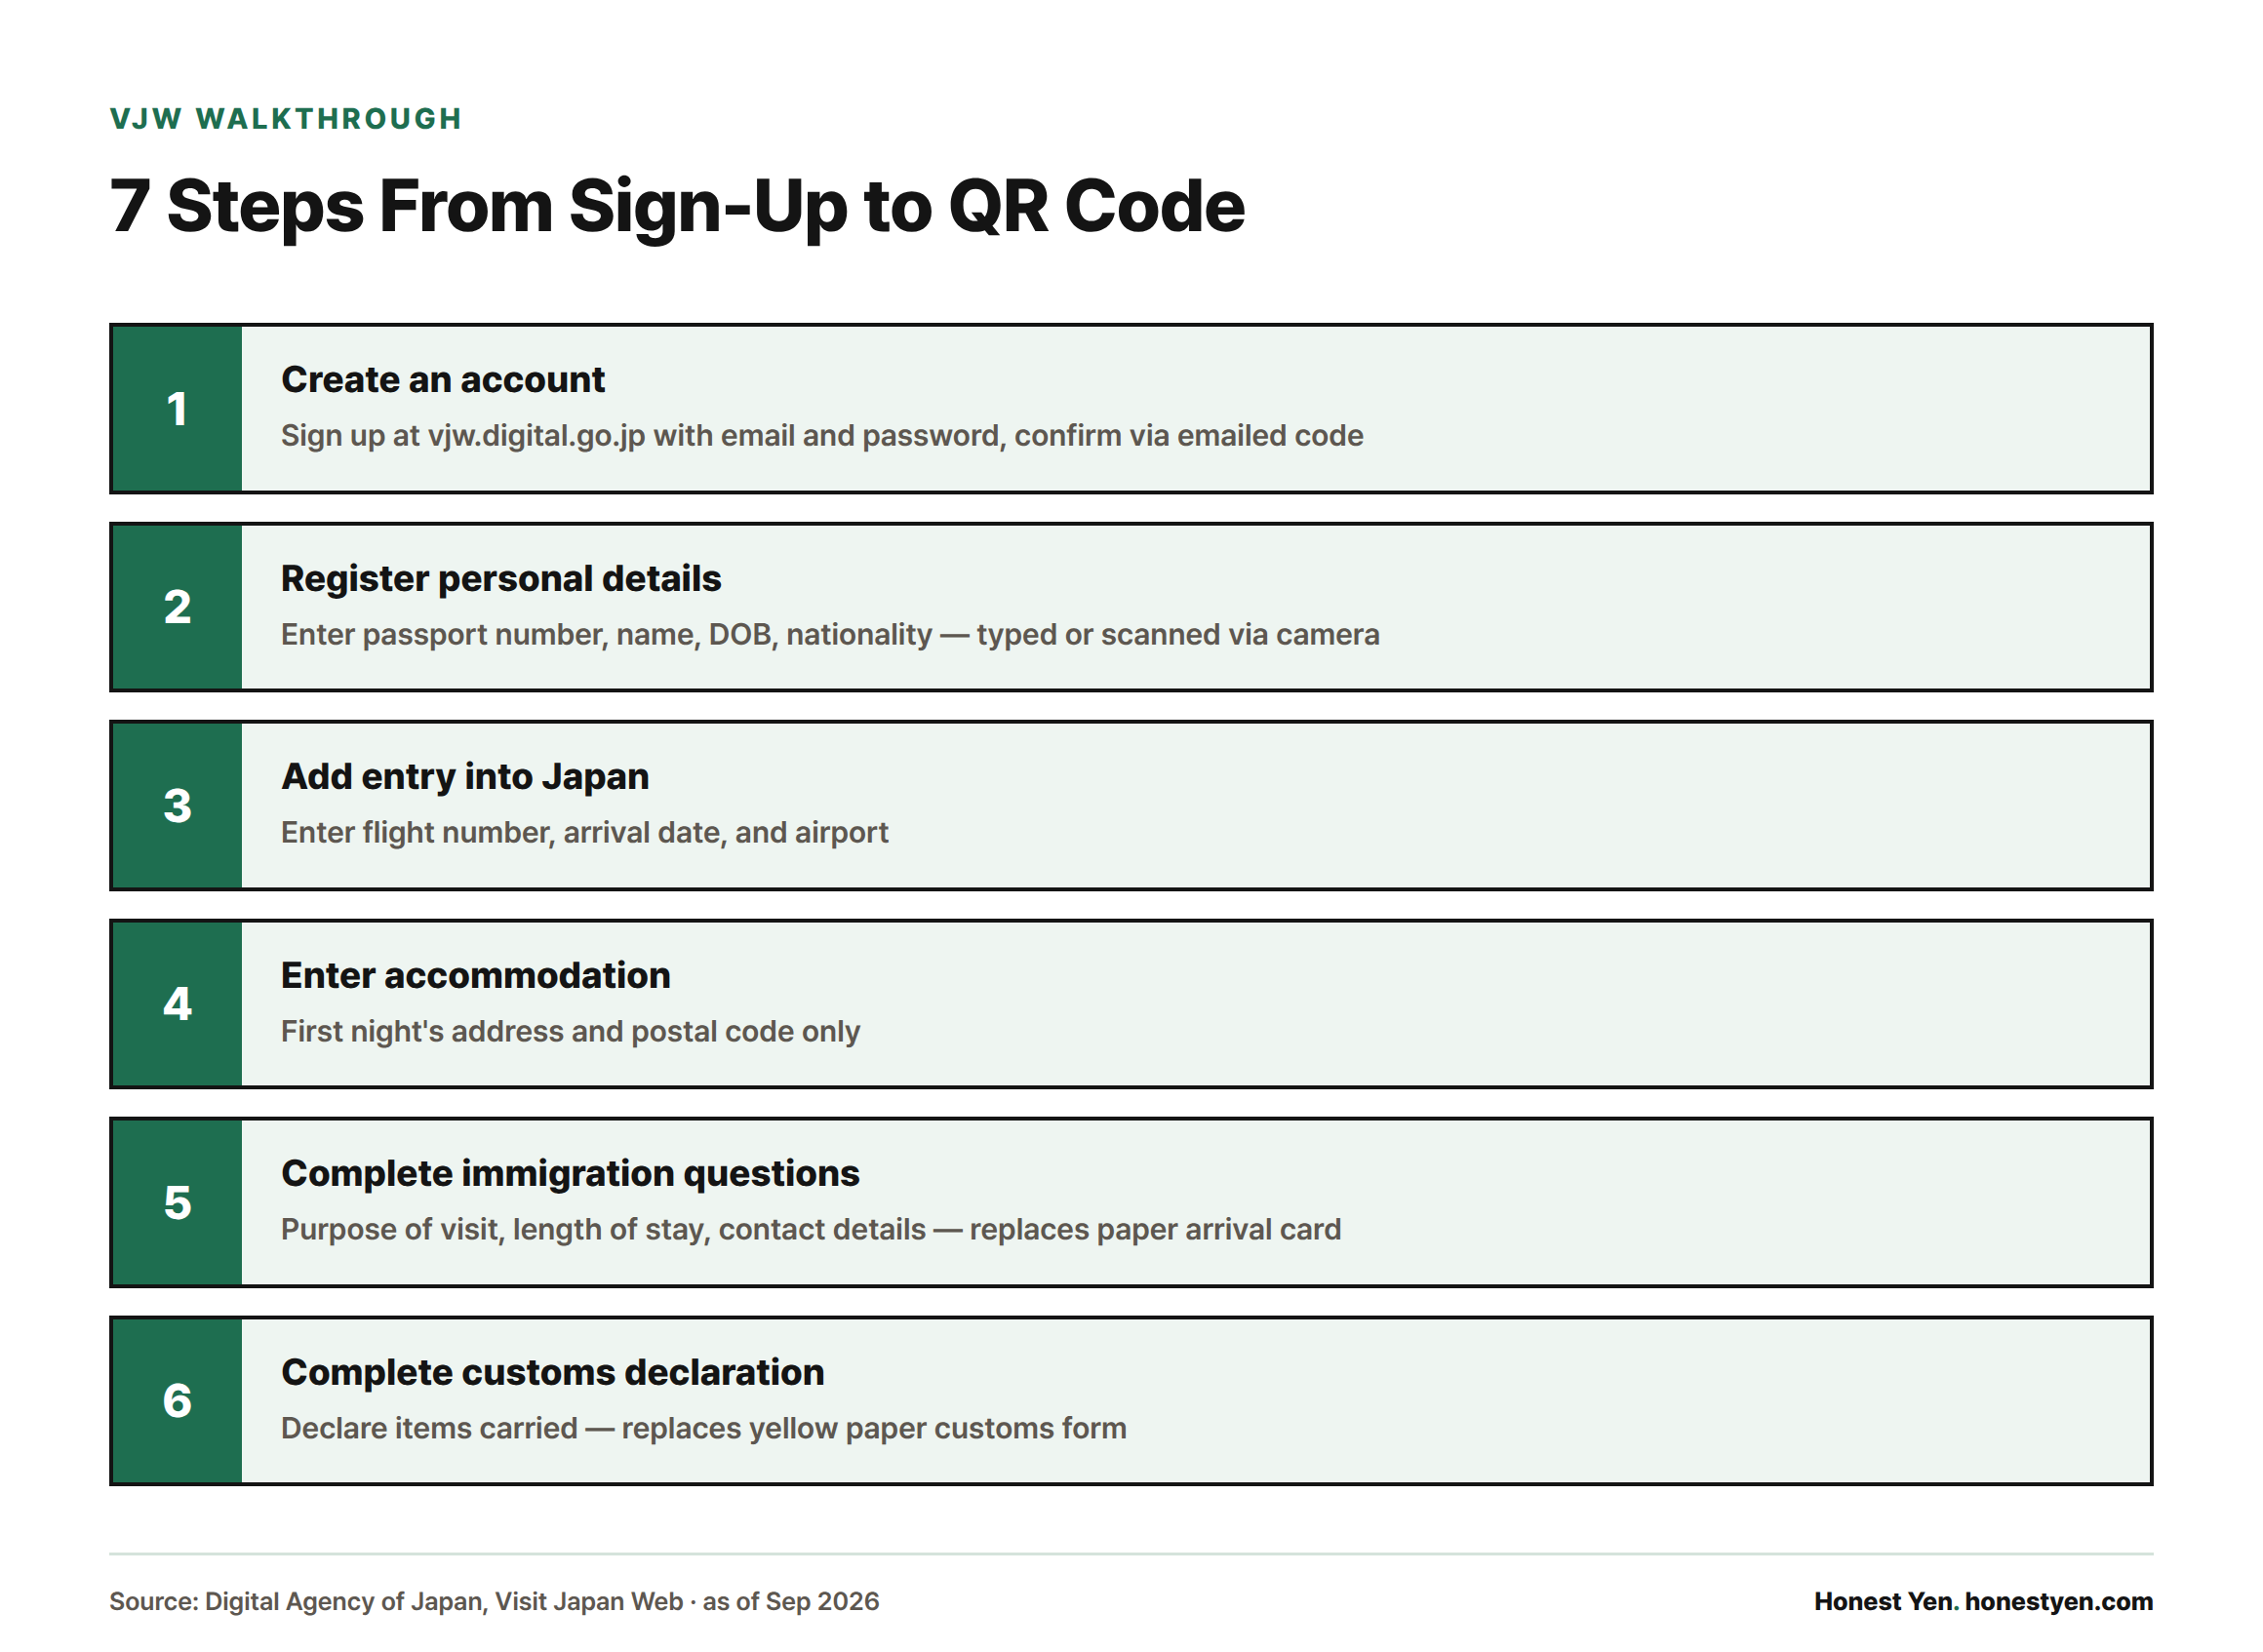
- Create an account at vjw.digital.go.jp with your email and a password, then confirm via the code sent to your inbox.
- Register your personal details — passport number, name, date of birth, nationality — either typed in or captured with your phone’s camera against the passport photo page.
- Add a new entry into Japan and enter your flight number, arrival date, and airport.
- Enter your accommodation for the first night only; later nights don’t need to be listed.
- Complete the immigration questions (purpose of visit, length of stay, contact details) — this replaces the paper arrival card.
- Complete the customs declaration questions about what you’re carrying — this replaces the yellow customs form.
- Generate your 2D code. Since January 25, 2024, immigration and customs share a single unified QR/2D code on Visit Japan Web; codes created by the old, separate Customs Declaration App no longer work.[3]
If you plan to shop tax-free, you can also link your passport to the tax-free registration feature so stores can scan it instead of stamping your passport — useful background if you’re planning a stop at somewhere like Don Quijote later in the trip.
Registering Family Members and Children
One adult can act as the representative for a group and register everyone traveling together under a single account using the “family/companion” registration option. Even so, every traveler — including infants — needs their own passport data entered and their own QR code generated individually; you can’t clear one code for the whole family. Save each person’s code as a separate screenshot before you land so you’re not hunting through one phone for four QR codes at the immigration counter.
At the customs e-Gate specifically, each passenger scans their own passport and code one by one, though children under 100cm can pass through the gate accompanying a parent or guardian rather than operating the terminal themselves.[4]
Website vs. App, and When to Register
Visit Japan Web is a browser-based service, not a downloadable app — you use it through your phone’s or computer’s browser, and there is no separate “Visit Japan” app to install. Be wary of anything in an app store claiming to be it; the only trustworthy address ends in vjw.digital.go.jp. There’s no official minimum lead time published, but because the record lives in the cloud, you can register weeks ahead, edit any field, and regenerate the QR code as many times as you need right up until you land — each new code simply replaces the last one. Practically, doing it before you board (or during a layover with wifi) is safer than trying to fill it out on limited airport wifi after a long flight.
Using Your QR Code at the Airport
After landing, open Visit Japan Web on your phone and have the 2D code ready. At immigration, present your passport and the code for scanning — at the seven airports with electronic e-Gates (New Chitose, Narita, Haneda, Chubu Centrair, Kansai, Fukuoka, and Naha), holding an IC-chip passport lets you use the automated gate instead of a manned counter.[4] After baggage claim, the same code covers customs: scan it at the electronic customs gate, or hand it to a customs officer at the manual desk if you’re routed there instead.
Common Registration Errors and How to Fix Them
| Symptom | Likely cause | Fix |
|---|---|---|
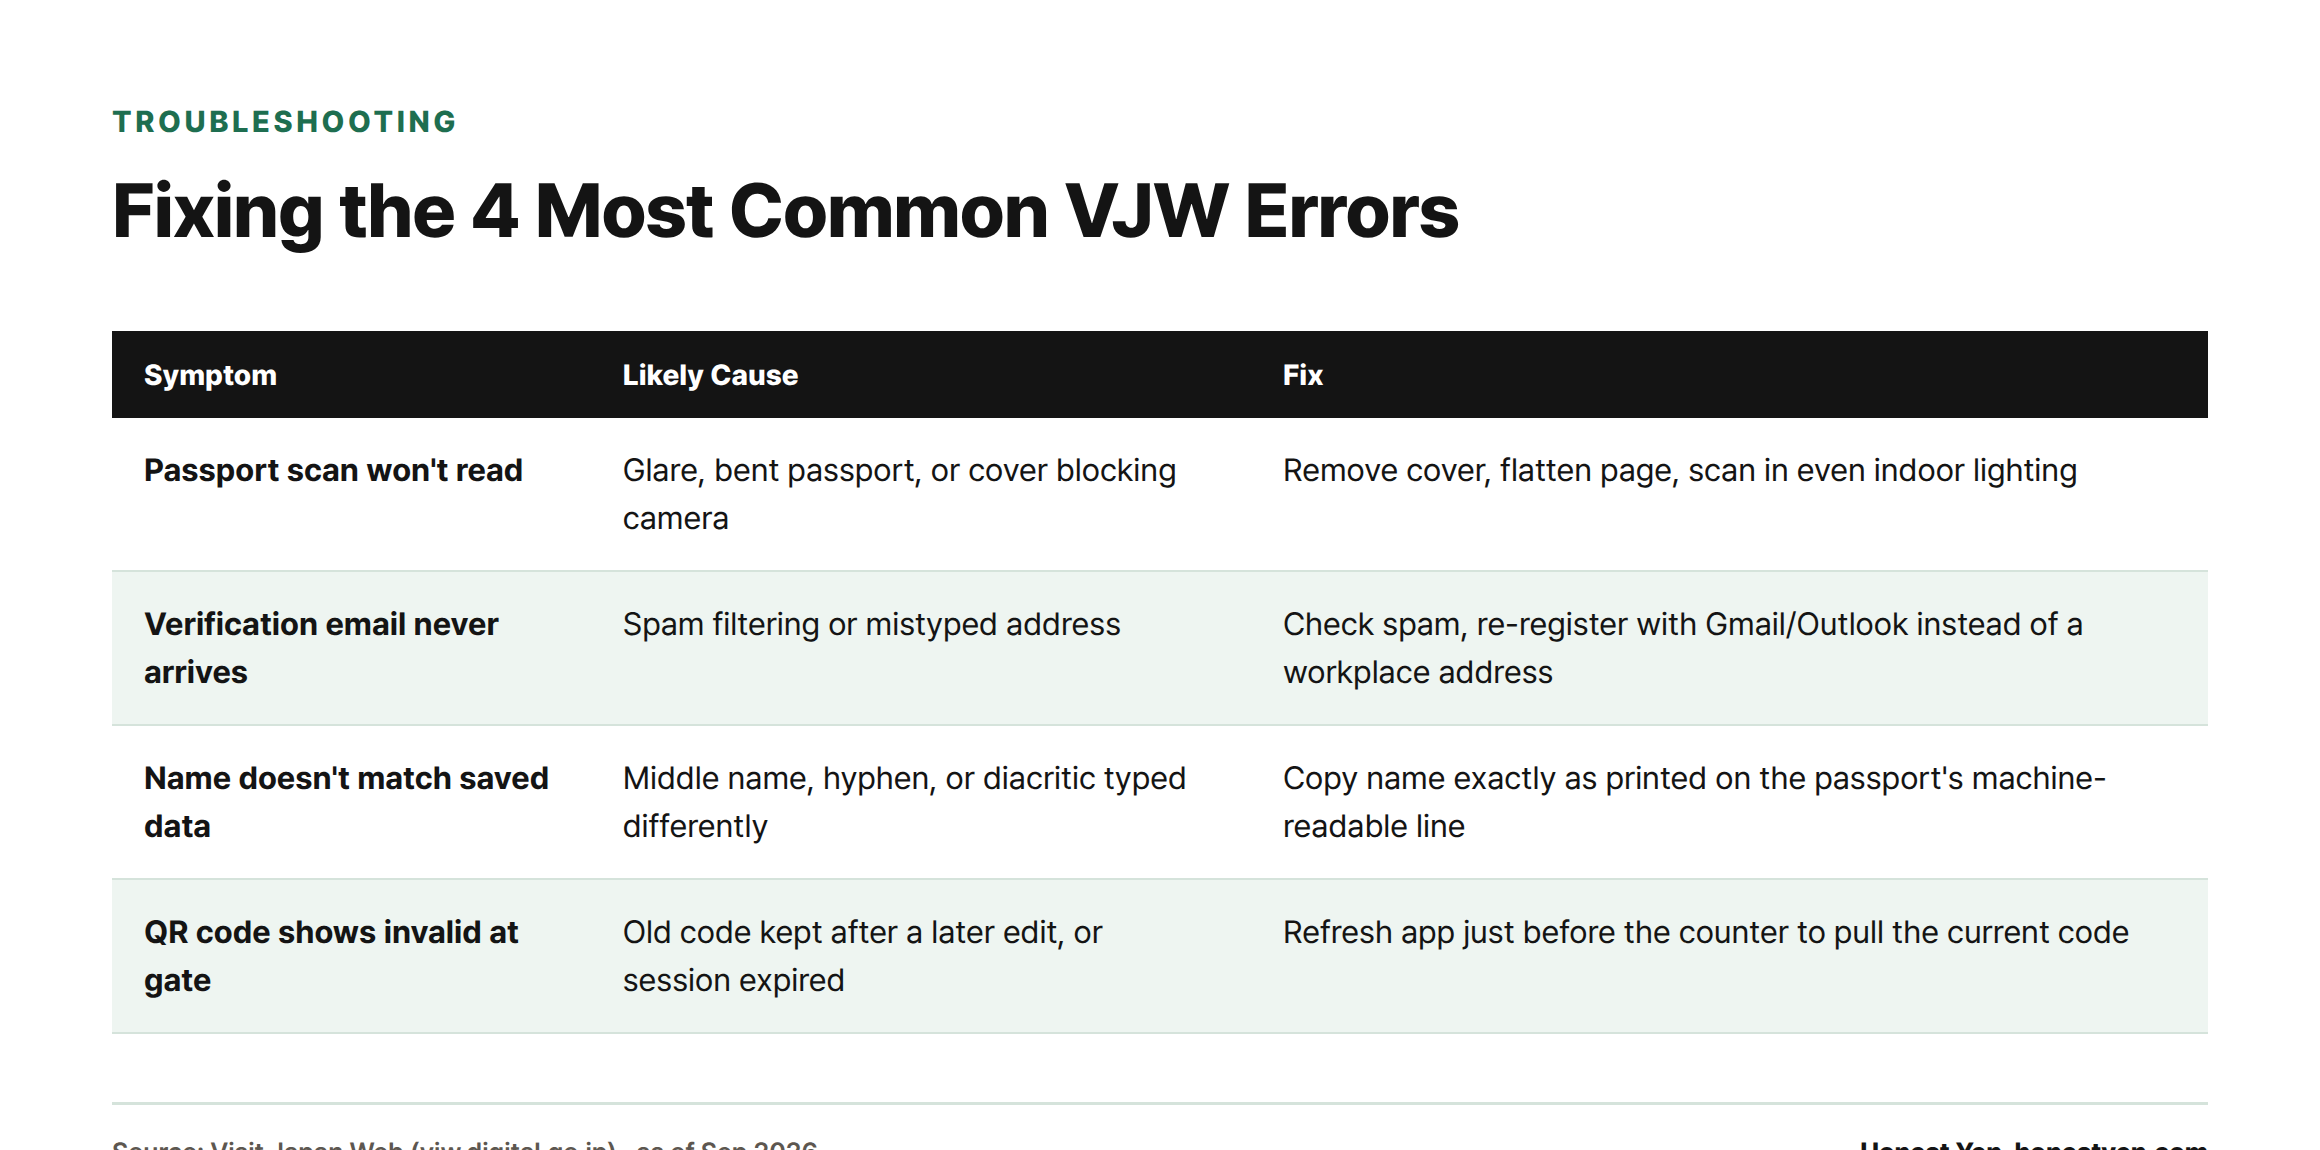
| Passport scan won’t read | Glare, a bent passport, or a cover blocking the camera | Remove any passport cover, flatten the page, and scan in even indoor lighting rather than sunlight |
| Verification email never arrives | Spam filtering or a mistyped address | Check spam/junk, then re-register with a different provider (Gmail/Outlook tend to be more reliable than workplace addresses) |
| Name doesn’t match saved data | Passport uses a middle name, hyphen, or diacritic differently than you typed | Copy the name exactly as printed in the passport’s machine-readable line, not how you normally write it |
| QR code shows as invalid at the gate | An old code was regenerated after a later edit, or the session expired | Re-open the app just before the counter and refresh to pull the current code — always use the most recent one, not a saved screenshot from days earlier |
Special Cases
No fixed accommodation for the first night: if you’re arriving on an overnight bus, ferry, or haven’t booked yet, use the address of any hotel or hostel you’re likely to stay at, or a friend/family address if you have one — you can correct it later if your plans change, since it isn’t verified against your actual movements.
A minor traveling without a parent: the accompanying adult (relative, tour leader, or the guardian back home) can create the minor’s entry as long as they have the child’s passport details; there’s no separate consent document built into VJW itself for this.
Data and privacy: the information you submit is used only for the Digital Agency’s entry, customs, and tax-free procedures, and is not linked to unrelated services. As with any government account, use a password unique to that login and log out on shared or hotel computers.
Customs Declaration: Duty-Free Limits
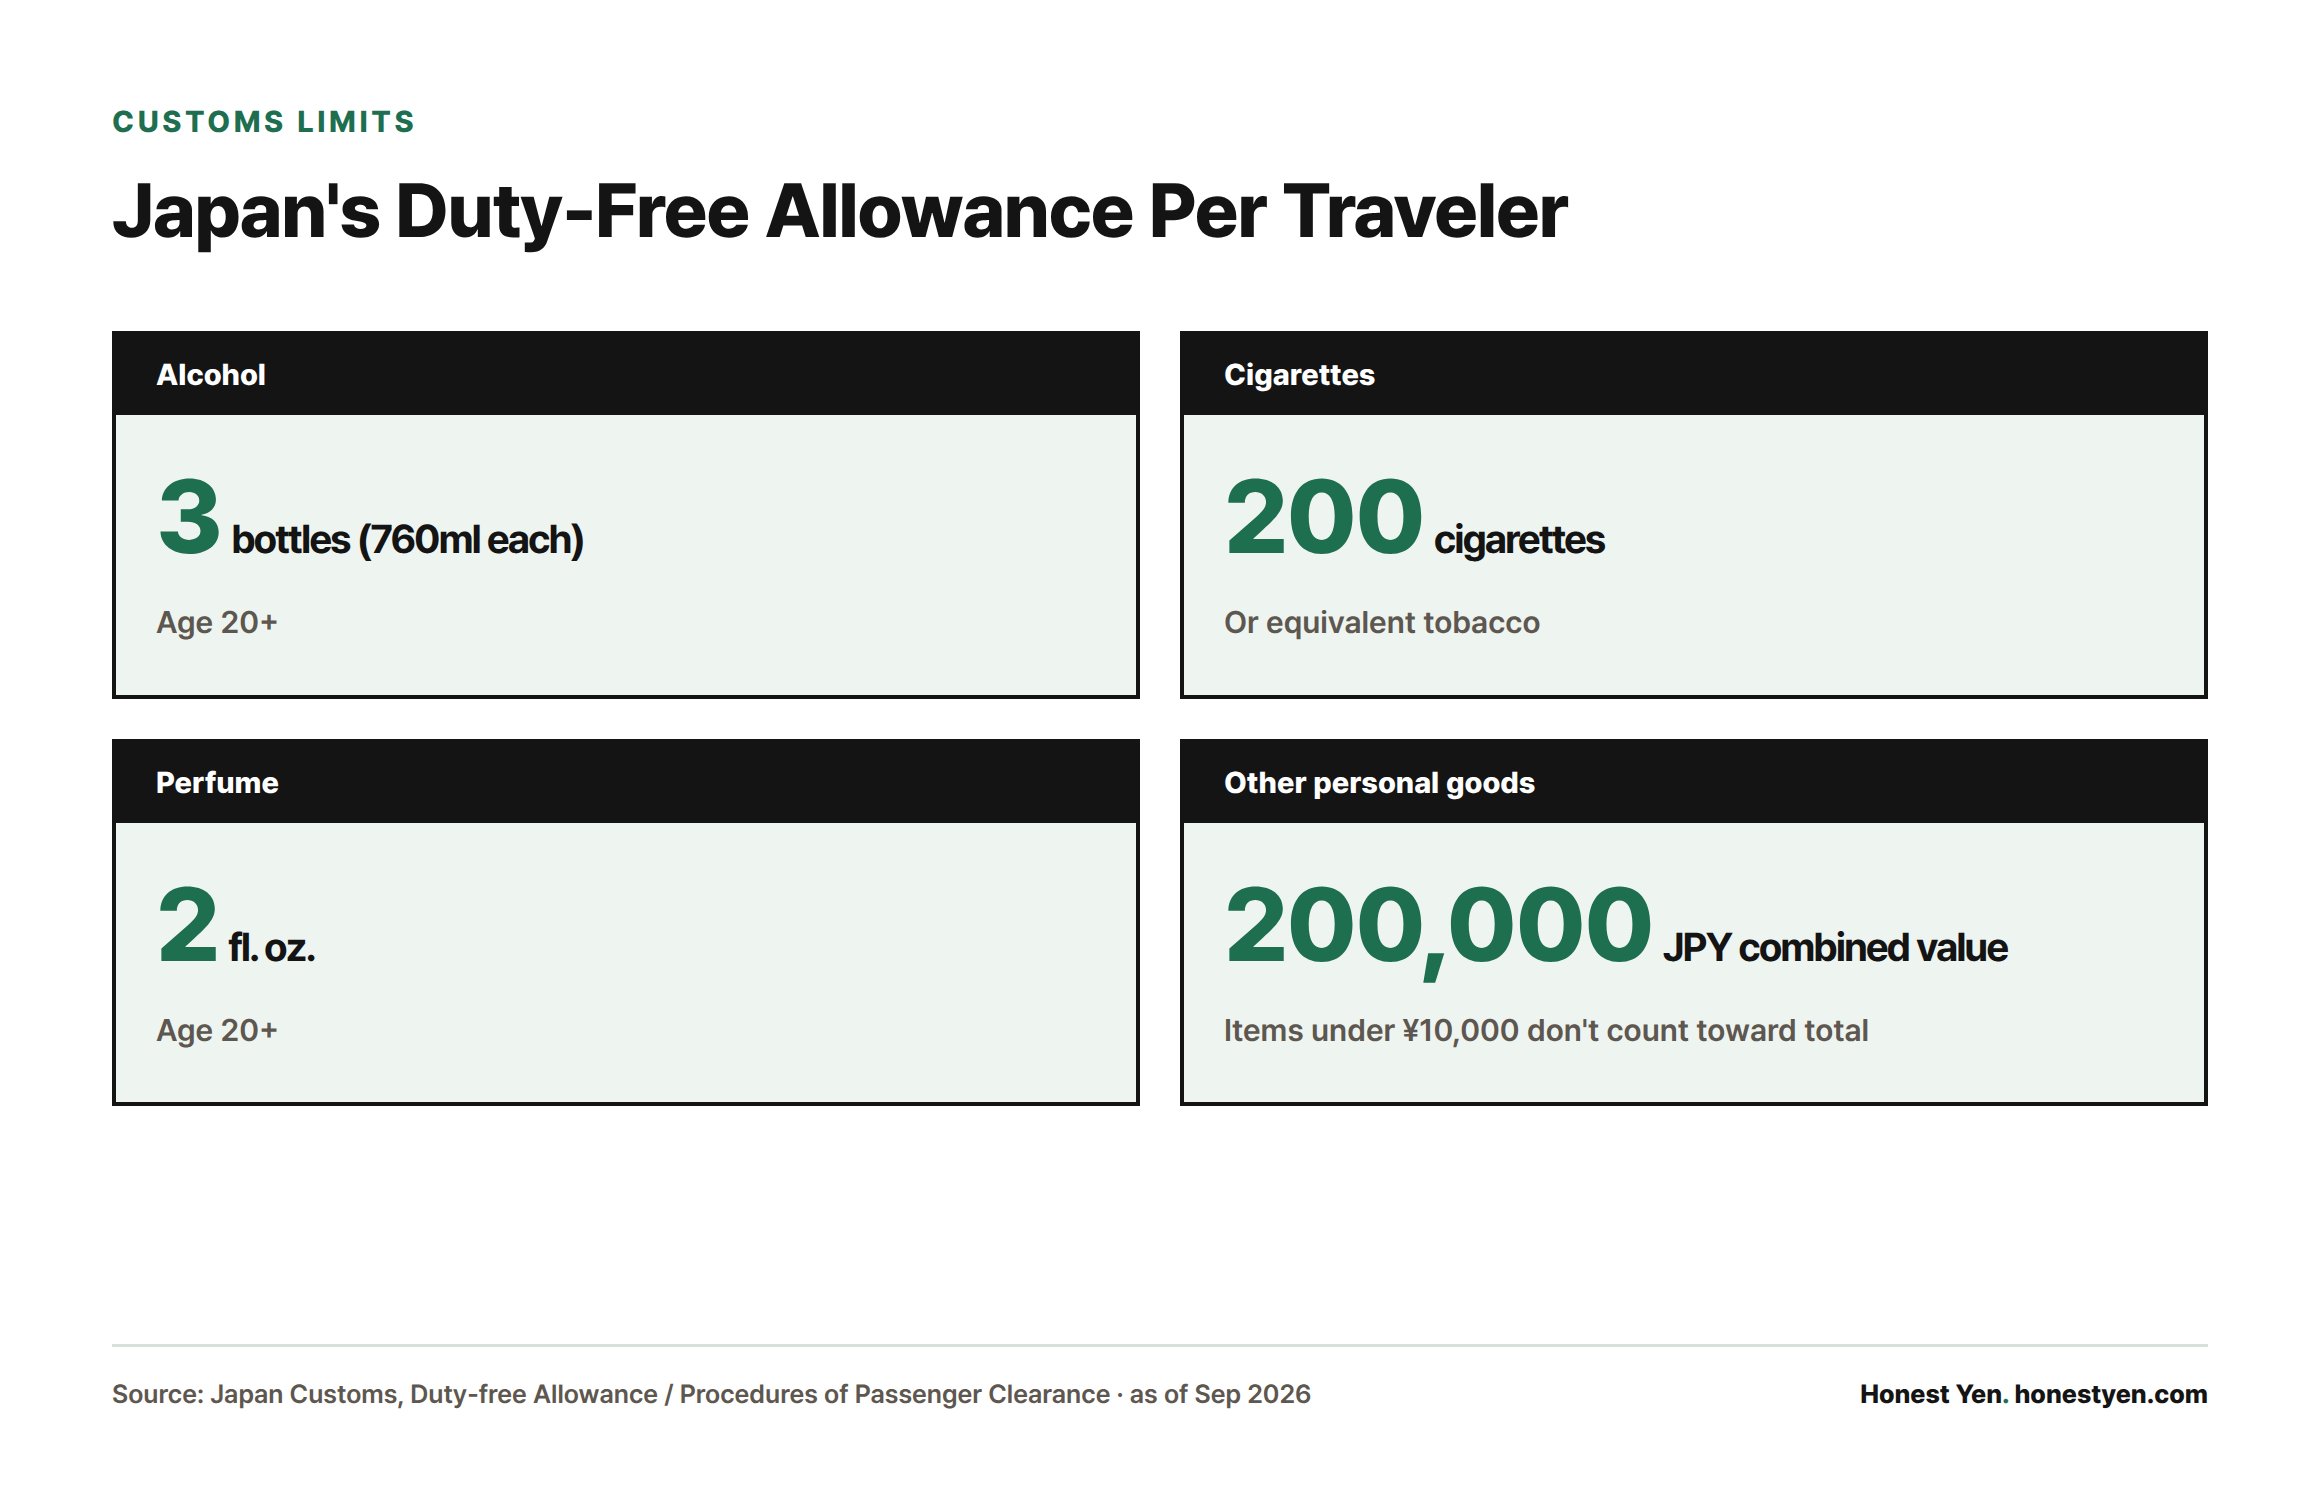
Whether you file electronically or on paper, the same duty-free allowances apply. Per traveler aged 20 or over: three 760ml bottles of alcoholic beverages; 200 cigarettes (or the equivalent — 10 packages of heated tobacco, 50 cigars, or 250g of other tobacco); and 2 fl. oz. of perfume.[5] Beyond those categories, all other personal goods are duty-free up to a combined overseas market value of ¥200,000, and any single item under ¥10,000 doesn’t count toward that total.[2] Prohibited items include narcotics, firearms and ammunition, explosives, counterfeit currency, and obscene material or child pornography; plants, animals, and certain meat products require separate quarantine inspection regardless of value.[2]
FAQ
Is Visit Japan Web required to enter Japan?
No. It’s optional — paper arrival and customs cards remain valid and are still handed out on flights and available at airports.[2]
Can I use just a screenshot of my QR code if I lose signal at the airport?
Yes, a saved screenshot scans the same as the live app screen, as long as it’s the most recently generated code — an outdated one from before an edit won’t validate.
How far in advance should I register?
Any time before you land works, since edits and new QR codes can be generated repeatedly; registering a day or two before departure, once your flight and first-night hotel are confirmed, avoids doing it on unfamiliar airport wifi.
Is there a Visit Japan Web mobile app?
No official standalone app exists — it runs in your phone’s browser at vjw.digital.go.jp. Ignore any app-store listing claiming otherwise.
What happens if my declared items exceed the duty-free limit?
You declare the actual value and pay duty on the amount above your allowance; under-declaring risks confiscation or penalties at the red channel or manual customs desk.[2]
Sources
- Digital Agency of Japan, “Visit Japan Web”
- Japan Customs, “Procedures of Passenger Clearance”
- Japan Customs, “Submission of Declaration of Accompanied Articles and Unaccompanied Articles”
- Japan Customs, “The Electronic Customs Declaration Gates (e-Gates) are available at 7 International Airports”
- Japan Customs, “(Reference) Duty-free Allowance”